


Introduction
Clever Cloud allows you to host your web applications (nodejs, java, php, and more) and databases (PostgreSQL, MySQL, Mongo, ...). Your application must necessarily listen on port 8080 so that clever Cloud redirects its load balancer and monitors the status of your application. This poses a problem for us, as a Minecraft server is not an HTTP server. In this article, we will see how to overcome this problem by using an additional TCP port provided by Clever Cloud and run an HTTP server within our application to serve as a relay on a Minecraft instance console.
Prerequisites
OpenJDK 17
wget utility
clever-tools (https://www.clever-cloud.com/doc/getting-started/cli/)
Create a directory to prepare the files to be sent to the Clever Cloud platform
cd /var/tmp/
mkdir papermc
export PAPERMCDIR=/var/tmp/papermc
Download PaperMC
wget https://api.papermc.io/v2/projects/paper/versions/1.19.3/builds/386/downloads/paper-1.19.3-386.jar -O paper.jar
Prepare PaperMC before deploying to Clever Cloud
Start PaperMC to generate the server directories
java -Xms2G -Xmx2G -jar paper.jar --nogui
Accept the Minecraft license
Edit the eula.txt file and change the eula=false parameter to eula=true
Start PaperMC to generate the rest of the server directories and files
java -Xms2G -Xmx2G -jar paper.jar --nogui
To exit the server console, type the stop command
Server Configuration
Edit the server.properties file and modify the following parameters:
...
query.port=4040
...
server-port=4040
Now, your Minecraft server will listen on TCP port 4040, which is necessary to use the TCP Transport function offered by Clever Cloud (lien)
Web Console Installation
It is important to be able to manage your Minecraft instance with the console. We will be able to use this fantastic plugin to meet our needs :
WebConsole
The server plugin
Go to the plugins directory of your PaperMC installation and run the following command :
cd plugins
wget https://github.com/mesacarlos/WebConsole/releases/download/v2.5/WebConsole-2.5.jar
Start the server to generate the configuration file and then modify it.
cd $PAPERMCDIR
java -Xms2G -Xmx2G -jar paper.jar --nogui
Once the server has started, stop it with the command stop
Go to the plugin installation directory
cd plugins/WebConsole
Edit the config.yml file and replace its entire content with this:
useSSL: false
StoreType: JKS
KeyStore: plugins/WebConsole/keystore.jks
StorePassword: pasbesoin
KeyPassword: pasbesoin
host: 127.0.0.1
port: 8181
language: en
passwords:
  admin:
    administrateur:
      password: myserverpassword
      commandWhitelist:
        enabled: false
        commandWhitelistActsAsBlacklist: false
        whitelist:
        - whisper
        - gamemode survival
  viewer: {}
Web Server
We need an HTTP server to distribute the web console's web interface and that must also act as a reverse-proxy on the plugin's websocket server. The simplest is to use Caddy. It is very easy to configure and does not consume a lot of memory. Let's start by downloading the front-end web.
cd $PAPERMCDIR
mkdir html
cd html
wget https://github.com/mesacarlos/WebConsole/releases/download/v2.4/client-2.4.zip
unzip client-2.4.zip
rm client-2.4.zip
cd ..
We will then download the HTTP server binary, Caddy
mkdir bin
cd bin
wget "https://caddyserver.com/api/download?os=linux&arch=amd64&idempotency=74870526505028" -O caddy
chmod a+x caddy
cd ..
At the root of your project, create the Caddyfile file and insert the following lines:
{
        http_port 8080
}

:8080 {
        root * ./html/client
        file_server
        @websockets {
                header Connection *Upgrade*
                header Upgrade websocket
        }
        reverse_proxy @websockets localhost:8181
}
Deployment on Clever Cloud
Creation of the application on Clever Cloud
We'll use clever-tools for the next operations. If this program is not yet installed and configured on your computer, please refer to the official documentation to do so :
clever tools
Still in the directory where you configured PaperMC, run the following commands to create and configure the application on Clever Cloud :
cd $PAPERMCDIR
clever login
clever create MineCraft --type jar --org <YOUR_ORGA_ID> --region par
clever config update --enable-force-https
clever scale --alias MineCraft --flavor M
clever addon create fs-bucket Minecraft-Data --link MineCraft --plan s --yes
clever tcp-redirs add --namespace cleverapps --alias MineCraft
clever env set CC_JAVA_VERSION 17
clever env set CC_JAR_PATH "./"
clever env set CC_RUN_COMMAND "java -Xms3G -Xmx3G -jar paper.jar --nogui --world-dir ./worlds-data"
clever env set CC_PRE_RUN_HOOK "nohup ./bin/caddy run --config Caddyfile &"
clever env set CC_FS_BUCKET "/worlds-data:`clever env | awk -F = '/BUCKET_HOST/ { print $2}'|sed 's/"//g'`"
Note: after validating the command clever tcp-redirs add --namespace cleverapps --alias MineCraft, clever-tools will display a message "Successfully added tcp redirection on port: xxxxx". Make sure to note this port, as you will need it to connect to the Minecraft server from your client.
Deployment
To deploy the Minecraft Server application, we will use git. However, it is out of the question to use this technique to send the files of your worlds. As an application on clever Cloud is immutable, we will have to send the world data to the FS Bucket in order to recover the state of the game at the next server launch. We will connect to the FS Bucket via FTP to send our world files. To find the FTP server connection information for your FS Bucket, go to the Clever Cloud web console:

I use FileZilla to send my files via FTP to the FS Bucket:

Once the transfer is complete, type the following commands to deploy the application on Clever Cloud.:
cd $PAPERMCDIR
rm -rf world*
git init
git add *
git commit -m "First deploy"
clever deploy
Your server will be ready in a few minutes.
Let's play a little !
Access the Web Console
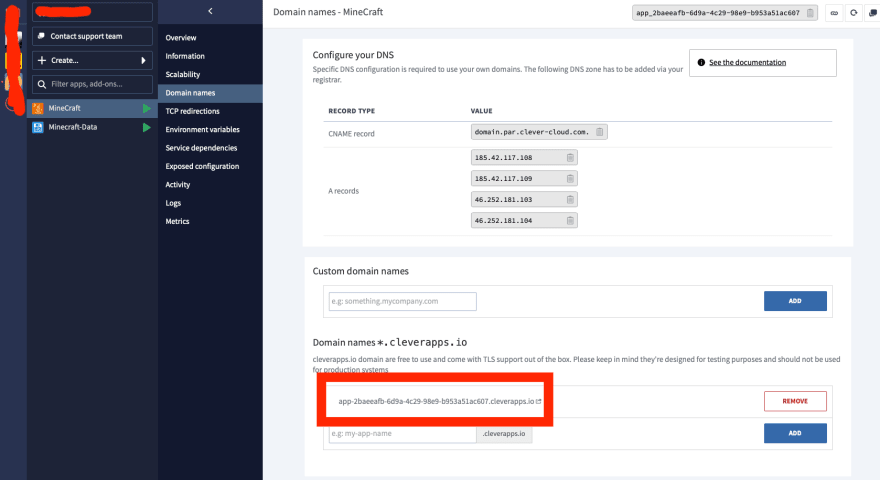
Just log in directly to your clever Cloud application URL. To find the URL, go to the clever Cloud console and click on the link:
You are now on the client interface of the Web Console.
Create a new connection:

The server will ask for a password that we have provided in the plugin configuration file. In our case, it's myserverpassword

You are now connected to your instance's console.

Connect with the Minecraft game
You will need the TCP port provided by clever-tools. If you did not note it, you can find it in the Clever Cloud console:

Launch the Minecraft program on your computer and select the Multiplayers / Direct Connection option
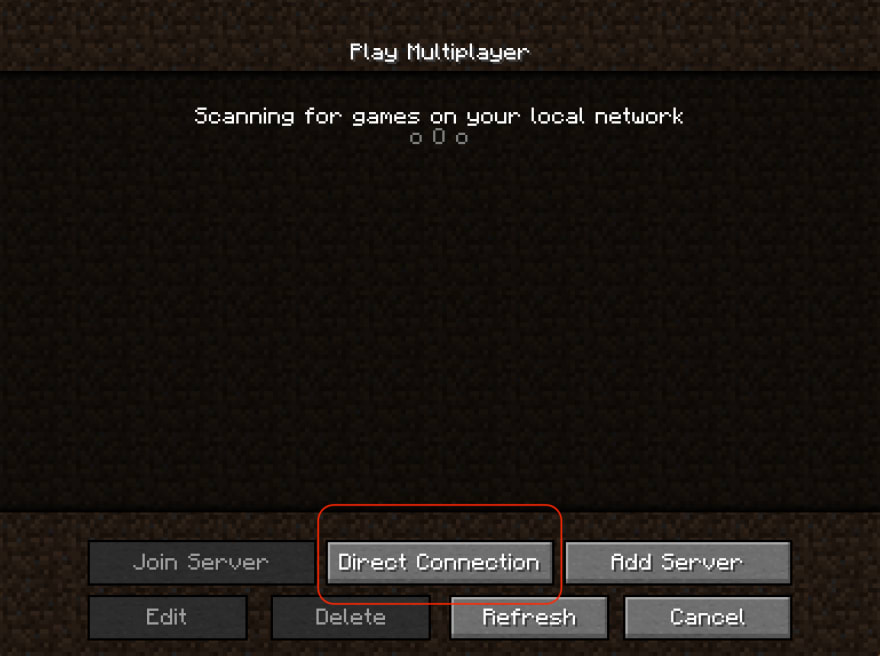
Enter the name of your clever Cloud server and the TCP port. For example:

After a few seconds, you only have to play!
